SwitzerlandTHE BEGINNING!
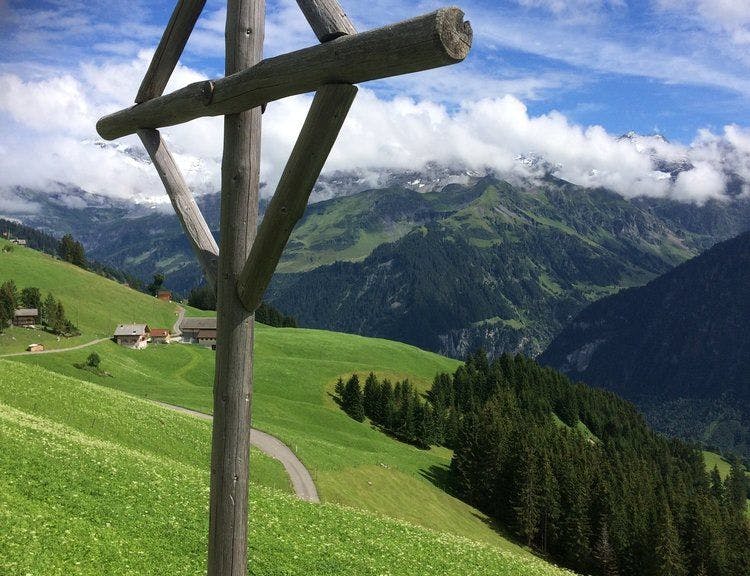
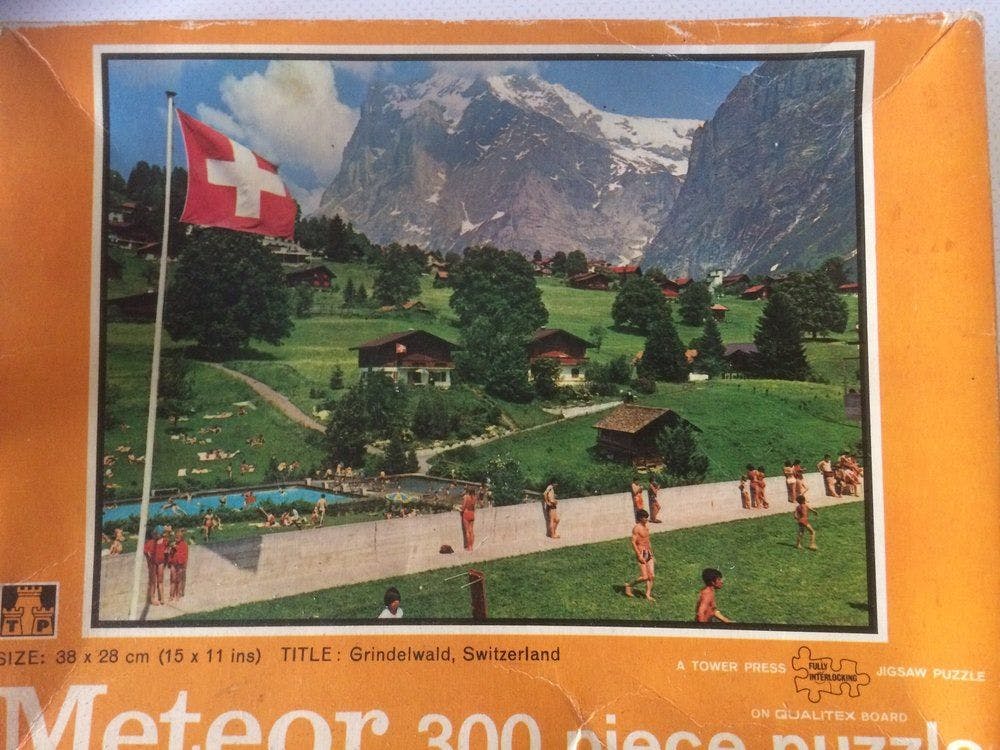
It all started with a beautiful photo in a Swiss calendar. Actually, to fully understand how my love for Switzerland grew, we must wind the clock back many, many years to my childhood. When I was about 11 or 12, I was given a jigsaw puzzle depicting a fairly crowded outdoor swimming pool: everyone enjoying a warm and sunny day, seemingly oblivious to the spectacular backdrop of snow-capped mountains hanging over their village. The jigsaw was simply entitled “Grindelwald, Switzerland”, which we could not find in our basic world atlas. I fell more in love with Grindelwald every time I made that jigsaw, and decided that one day I would locate the village and see it for myself.
 .
.
.
.
.
.
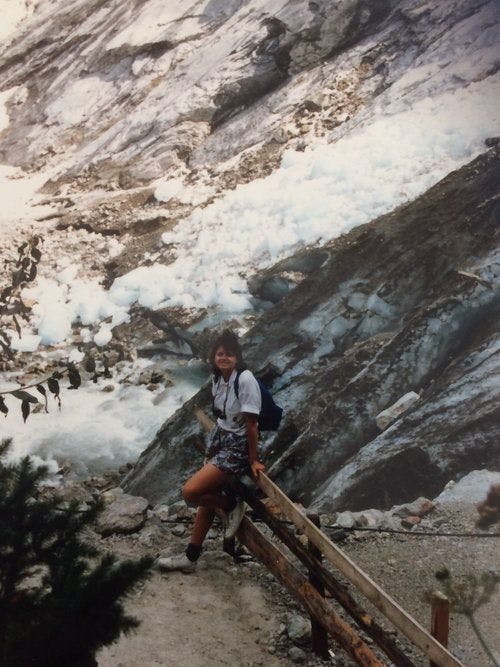
Years flew by, air travel became more popular, and technology made the world a little more accessible. By the age of 24 I had wandered through Switzerland with a friend, and not only did I locate and visit my beloved Grindelwald, I stood in the same spot as the photographer of my jigsaw puzzle! Anyone who has ever admired a picture for many years, then eventually found themselves standing in a “live version” of that scene will agree that it’s an uplifting and slightly surreal experience!
But I digress….. back to the Swiss calendar: when I came upon this calendar picture I was much older, a little wiser (!), married (with kids), had Swiss friends and had travelled extensively throughout Switzerland, strengthening my bond with the country and making me wonder if I had lived there in a previous life (if you believe in all that reincarnation stuff!).
Planning:
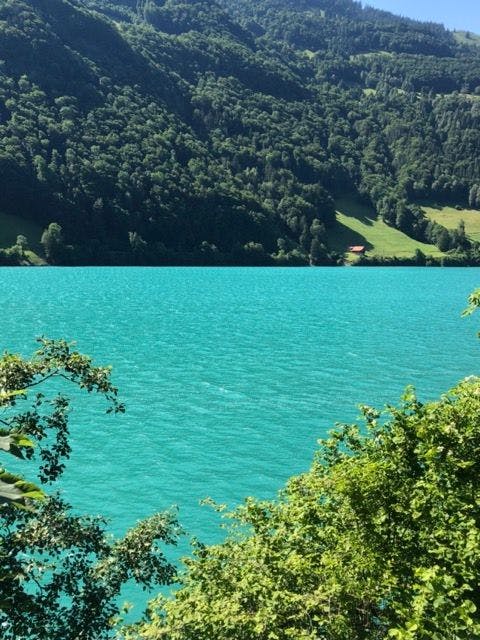
We (my husband and I) had always discussed a walking holiday, perhaps with guide/s. We had read of multi-day hikes from Grindelwald to Locarno, knowing full well the fitness level required. Years later, a beautiful, peaceful scene of a flowery meadow stretching down to a small lake being fed by a distant waterfall tumbling down sheer mountain cliffs (!) came into my life, courtesy of that Swiss calendar. It was entitled “Lauenensee, BE”, and I knew I had to see it one day. A quick search on the computer linked it to something called the “Via Alpina”, and suddenly I found myself planning a 3- to 4-week trip. I was researching almost every evening, and soon we had flights booked and our first accommodation confirmed. When I say ‘confirmed’: the Swiss honesty system lives on, and many of the guesthouse owners replied to my email to confirm my booking with no request for a deposit or credit card details. This generally applies to the more “out of the way” places, not to hotels in larger villages and cities.
The entire trip was planned with the help of the guidebook: “Hiking in Switzerland- Via Alpina (National Route 1)”, and- more importantly- my smartphone. There were various helpful websites and I used an excellent map of Europe, plus made use of Google Maps.
(2023 edit: Download the Swiss Mobility App: a white '*' on a red background, for absolutely EVERYTHING you need on Swiss maps including cable cars, roads, buildings, topography... the list goes on. Plus you can adapt it by selecting your specific mobility, whether it be hiking, cycling, canoeing, even snowshoeing in winter!)
Zooming in on Google Maps and finding the purple bed icons revealed possible places for overnight stays, then a quick click on the link enabled me to decide if it was in our price range. In the larger towns, like Engelberg, I was able to select a place that didn’t take us too far from the end of the trail we were completing, and was near to the beginning of the next day’s journey.
Why this blog?
…Because many people asked me how I planned the walks, how I found all the overnight stay accommodation, how it all worked out, etc.! Other websites and blogs were written by hikers with SatNav devices, which are now- perhaps- a little outdated. I found there was no need for these. With your smartphone you have your camera, maps and communication device on one small, hand-held instrument!
IMPORTANT! Once in Switzerland, having a data-only SIM card enabled us to make use of Google Maps in many situations, especially when entering a large village and making our way to our hotel. We could also use Face Time to contact our family back home. Generally, the trails are so well sign-posted that the use of any map is unnecessary, but we did have one or two moments of uncertainty. I highly recommend getting your hands on one of these, or arrange roaming on your existing SIM.
 Arriving in Zürich
.
.
.
Arriving in Zürich
.
.
.
IMPORTANT! Once in Switzerland, having a data-only SIM card enabled us to make use of Google Maps in many situations, especially when entering a large village and making our way to our hotel. We could also use Face Time to contact our family back home. Generally, the trails are so well sign-posted that the use of any map is unnecessary, but we did have one or two moments of uncertainty. I highly recommend getting your hands on one of these, or arrange roaming on your existing SIM.
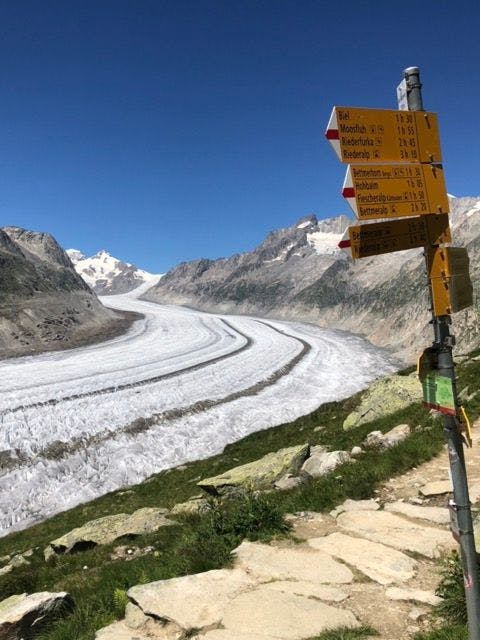
ALSO- Most people walking the Via Alpina will be making use of the wonderful Swiss travel system on more than one occasion. Get the mobile app. of the SBB CFF FFS (SBB Mobile) so you can plug in your location and your destination, and have the timetables at your fingertips. It gives you the options you can take, tells you if you are taking train/bus/boat, and even gives you an idea of the expected occupancy levels of each mode of transport!
Below is a very useful link to the Holidays to Switzerland site. This article will tell you all about the Swiss Pass:
https://holidaystoswitzerland.com/swiss-travel-pass-switzerlands-all-in-one-transport-pass/
Preparation:
We are both in our early fifties, and not unfit, though we certainly needed to get in shape for walking! We do the occasional 5km fun-run, and most weekends are spent at the gym running on treadmills, doing a little cross-training and lifting weights here and there. We purchased good quality, lightweight walking boots 3 months before our departure date and started off with short walks to wear them in. We progressed on to much longer walks, though still on relatively flat ground. Unfortunately, Melbourne’s North-West is not known for its mountainous territory, so we struggled to find a suitable area to walk up and down hills, eventually settling on the rather steep terrain of the Organ Pipes National Park. We started taking our backpacks, adding more and more weight, and completing 3 circuits instead of 2. By mid-July we felt we were ready, though in retrospect I think we should have done at least 1 serious day-hike in one of the mountain ranges around Melbourne. Nevertheless, off we went!
 Hill training at the Organ Pipes NP
.
 Early morning (frosty!) training walk.
Packing:
Given that you are carrying everything on your back, this is a very important.
For our 3-week break, we found the following was sufficient:
· 3-4 pairs underpants
· 2 exercise bra tops for ladies
· 2 lightweight exercise T-shirts (absorbent and quick-dry)
· 1 swimsuit (optional, but necessary if you have a hotel with a pool!)
· 2-3 pairs exercise leggings for ladies, including one full-length/ 2-3 pairs shorts for men; 1 long pair leggings to go under shorts.
· 3 pairs exercise socks (extra padding)
· 1 fleece/hooded top (see notes below)
· 1 lightweight, better-quality shirt (men) /dress or skirt (ladies) for dinner
· 1 lightweight scarf, especially for ladies (see notes below)
· Walking boots, plus 1 pair lightweight casual shoes/sandals (see notes below)
· Gaiters (waterproof) or 1 pair waterproof pants (see notes below)
· 1 raincoat (see notes below)
· 1 sunhat
· 1 small microfibre towel to carry (see notes)
NOTES:
o FLEECE/HOODIE: Choose carefully. Mine was a 52% cotton, 48% polyester knit with hood which held in a lot of warmth. It had long sleeves, with thumb-holes so I could pull the sleeves half over my hands, and they acted as partial gloves in colder weather, so I did not pack gloves. If there is no hood, a warm hat is necessary. (At the very least, the fleece should have a very high zip-up neck.)
o SCARF: I found this indispensable, as I could wrap it around my shoulders on a cool evening, plus I could wear my black exercise T-shirt with a light skirt to dinner. The scarf hid the reflective stripe on the upper back of the T-shirt, which was the only thing that “gave it away”!
o BOOTS: Spend money on these; try on several and walk around the shop. Buy the ones that feel the most comfortable, preferably not too heavy on your feet. We put an extra waterproof coating on our boots just before we left Australia.
Casual shoes/sandals are optional, though very few people want to wear their walking boots down to dinner in their hotel! Again, choose carefully. The lighter- and the more versatile- the better!
o GAITERS/WATERPROOF PANTS: Both of us had only waterproof gaiters, which kept our lower legs dry. Walking in a light snow-shower was not exactly what we had envisioned, and waterproof pants would have been ideal, as my long leggings were not really adequate and I had to keep moving to stay warm. If you plan to cross passes in all ranges of weather, take lightweight waterproof pants.
o RAINCOAT: Also spend money on a good raincoat. Windproof, waterproof, with stow-away hood and numerous pockets. On the day mentioned above, three layers consisting of T-shirt, light knit hoodie and the raincoat ensured I was warm enough, at least on the top!
o MICROFIBRE TOWEL: Like the raincoat, backpack and boots, we purchased this from a shop which specializes in hiking/camping, etc. On hot days I dampened this with cold water before setting off. You can see mine (bright pink) in many photos. My husband turned his into a headscarf!

 My roll-up compact toiletery case
.
.
.
My roll-up compact toiletery case
.
.
.
Further packing: Toiletries and other essential items
o Shampoo/conditioner
o Toothbrush/toothpaste
o Sunscreen & SPF lip balm
o Basic medical kit including anti-inflamm cream/tablets, plasters (band-aids), paracetamol and any other medication you may need. If you have a slightly weak knee (like me!), an elastic brace is a must. It really helped, especially in the downhill sections.
Another recommendation is a small pack of blister-covering plasters. Despite all the preparation walks, I still managed to get a blister on 1 toe. I highly recommend the “Compeed” brand, purchased in Switzerland. The plasters make a protective gel-like layer form across the blister, which lasts for many days.
o Small amount of washing powder for clothes
o Small plastic container for carrying food
o Zip-lock bags of various sizes. I had several, and mine carried a small phone-charging device (also highly recommended), my charging cord, lip balm and other items I wanted on hand in the side pockets of my backpack. A larger one carried soiled clothes for washing.
o At least one large bottle for water. (I took one small bottle that was designed for running: it had an elastic holder that fits over your hand, plus 1 large bottle which hung from the front of my pack with a Velcro strap)……
o A couple of Velcro straps and/or mountaineering rope clips- carabiners- are very handy. I bought mine from a baby-goods shop (believe it or not!), as many mums use them to hang things from their buggies.
Decant as many shampoos, lotions, perfume/aftershave, etc. as you can into small plastic (leak-proof) containers. Label them well.
Your backpack:
Along with boots and raincoat, this is the 3rd item you should choose carefully. Mine was the right size and shape for my needs (don’t be afraid to try several), plus it had a built-in retractable rain cover and good-sized side pockets for easy access. My husband had an older backpack, and the rain cover was bought separately. When you read about our first pass crossing, you will see why we will be spending money on a new backpack for him before going on any similar walking holidays!
The toiletry pack I chose was excellent, and it could hang anywhere for easy access, then roll up into a fairly small cylindrical shape. I recommend looking around for something similar.
The flight:
This is when all those who live in the UK (or even closer) can have a laugh! When flying from faraway places like Australia, a little bit of planning ahead does not go astray, especially when you are accustomed to carrying a handbag at the very least!
Remembering that everything you have must eventually be carried on your back (or discarded!), I took a couple small bottles of lotion, saline (I wear contact lenses), glasses, etc. in a zip-lock bag, my phone (of course), and some magazines which were “handed on” at my destination. In-flight entertainment is so good that the magazines are just an option to reduce screen-time.
....And on to the walk!
SwitzerlandTHE BEGINNING!
It all started with a beautiful photo in a Swiss calendar. Actually, to fully understand how my love for Switzerland grew, we must wind the clock back many, many years to my childhood. When I was about 11 or 12, I was given a jigsaw puzzle depicting a fairly crowded outdoor swimming pool: everyone enjoying a warm and sunny day, seemingly oblivious to the spectacular backdrop of snow-capped mountains hanging over their village. The jigsaw was simply entitled “Grindelwald, Switzerland”, which we could not find in our basic world atlas. I fell more in love with Grindelwald every time I made that jigsaw, and decided that one day I would locate the village and see it for myself.
.
.
.
Years flew by, air travel became more popular, and technology made the world a little more accessible. By the age of 24 I had wandered through Switzerland with a friend, and not only did I locate and visit my beloved Grindelwald, I stood in the same spot as the photographer of my jigsaw puzzle! Anyone who has ever admired a picture for many years, then eventually found themselves standing in a “live version” of that scene will agree that it’s an uplifting and slightly surreal experience!
But I digress….. back to the Swiss calendar: when I came upon this calendar picture I was much older, a little wiser (!), married (with kids), had Swiss friends and had travelled extensively throughout Switzerland, strengthening my bond with the country and making me wonder if I had lived there in a previous life (if you believe in all that reincarnation stuff!).
Planning:
We (my husband and I) had always discussed a walking holiday, perhaps with guide/s. We had read of multi-day hikes from Grindelwald to Locarno, knowing full well the fitness level required. Years later, a beautiful, peaceful scene of a flowery meadow stretching down to a small lake being fed by a distant waterfall tumbling down sheer mountain cliffs (!) came into my life, courtesy of that Swiss calendar. It was entitled “Lauenensee, BE”, and I knew I had to see it one day. A quick search on the computer linked it to something called the “Via Alpina”, and suddenly I found myself planning a 3- to 4-week trip. I was researching almost every evening, and soon we had flights booked and our first accommodation confirmed. When I say ‘confirmed’: the Swiss honesty system lives on, and many of the guesthouse owners replied to my email to confirm my booking with no request for a deposit or credit card details. This generally applies to the more “out of the way” places, not to hotels in larger villages and cities.
The entire trip was planned with the help of the guidebook: “Hiking in Switzerland- Via Alpina (National Route 1)”, and- more importantly- my smartphone. There were various helpful websites and I used an excellent map of Europe, plus made use of Google Maps.
(2023 edit: Download the Swiss Mobility App: a white '*' on a red background, for absolutely EVERYTHING you need on Swiss maps including cable cars, roads, buildings, topography... the list goes on. Plus you can adapt it by selecting your specific mobility, whether it be hiking, cycling, canoeing, even snowshoeing in winter!)
Zooming in on Google Maps and finding the purple bed icons revealed possible places for overnight stays, then a quick click on the link enabled me to decide if it was in our price range. In the larger towns, like Engelberg, I was able to select a place that didn’t take us too far from the end of the trail we were completing, and was near to the beginning of the next day’s journey.
Why this blog?
…Because many people asked me how I planned the walks, how I found all the overnight stay accommodation, how it all worked out, etc.! Other websites and blogs were written by hikers with SatNav devices, which are now- perhaps- a little outdated. I found there was no need for these. With your smartphone you have your camera, maps and communication device on one small, hand-held instrument!
IMPORTANT! Once in Switzerland, having a data-only SIM card enabled us to make use of Google Maps in many situations, especially when entering a large village and making our way to our hotel. We could also use Face Time to contact our family back home. Generally, the trails are so well sign-posted that the use of any map is unnecessary, but we did have one or two moments of uncertainty. I highly recommend getting your hands on one of these, or arrange roaming on your existing SIM.
Arriving in Zürich
.
.
.
IMPORTANT! Once in Switzerland, having a data-only SIM card enabled us to make use of Google Maps in many situations, especially when entering a large village and making our way to our hotel. We could also use Face Time to contact our family back home. Generally, the trails are so well sign-posted that the use of any map is unnecessary, but we did have one or two moments of uncertainty. I highly recommend getting your hands on one of these, or arrange roaming on your existing SIM.
ALSO- Most people walking the Via Alpina will be making use of the wonderful Swiss travel system on more than one occasion. Get the mobile app. of the SBB CFF FFS (SBB Mobile) so you can plug in your location and your destination, and have the timetables at your fingertips. It gives you the options you can take, tells you if you are taking train/bus/boat, and even gives you an idea of the expected occupancy levels of each mode of transport! Below is a very useful link to the Holidays to Switzerland site. This article will tell you all about the Swiss Pass:
https://holidaystoswitzerland.com/swiss-travel-pass-switzerlands-all-in-one-transport-pass/
Preparation: We are both in our early fifties, and not unfit, though we certainly needed to get in shape for walking! We do the occasional 5km fun-run, and most weekends are spent at the gym running on treadmills, doing a little cross-training and lifting weights here and there. We purchased good quality, lightweight walking boots 3 months before our departure date and started off with short walks to wear them in. We progressed on to much longer walks, though still on relatively flat ground. Unfortunately, Melbourne’s North-West is not known for its mountainous territory, so we struggled to find a suitable area to walk up and down hills, eventually settling on the rather steep terrain of the Organ Pipes National Park. We started taking our backpacks, adding more and more weight, and completing 3 circuits instead of 2. By mid-July we felt we were ready, though in retrospect I think we should have done at least 1 serious day-hike in one of the mountain ranges around Melbourne. Nevertheless, off we went!
Hill training at the Organ Pipes NP
.
Early morning (frosty!) training walk.
Packing:
Given that you are carrying everything on your back, this is a very important.
For our 3-week break, we found the following was sufficient:
· 3-4 pairs underpants
· 2 exercise bra tops for ladies
· 2 lightweight exercise T-shirts (absorbent and quick-dry)
· 1 swimsuit (optional, but necessary if you have a hotel with a pool!)
· 2-3 pairs exercise leggings for ladies, including one full-length/ 2-3 pairs shorts for men; 1 long pair leggings to go under shorts.
· 3 pairs exercise socks (extra padding)
· 1 fleece/hooded top (see notes below)
· 1 lightweight, better-quality shirt (men) /dress or skirt (ladies) for dinner
· 1 lightweight scarf, especially for ladies (see notes below)
· Walking boots, plus 1 pair lightweight casual shoes/sandals (see notes below)
· Gaiters (waterproof) or 1 pair waterproof pants (see notes below)
· 1 raincoat (see notes below)
· 1 sunhat
· 1 small microfibre towel to carry (see notes)
NOTES:
o FLEECE/HOODIE: Choose carefully. Mine was a 52% cotton, 48% polyester knit with hood which held in a lot of warmth. It had long sleeves, with thumb-holes so I could pull the sleeves half over my hands, and they acted as partial gloves in colder weather, so I did not pack gloves. If there is no hood, a warm hat is necessary. (At the very least, the fleece should have a very high zip-up neck.)
o SCARF: I found this indispensable, as I could wrap it around my shoulders on a cool evening, plus I could wear my black exercise T-shirt with a light skirt to dinner. The scarf hid the reflective stripe on the upper back of the T-shirt, which was the only thing that “gave it away”!
o BOOTS: Spend money on these; try on several and walk around the shop. Buy the ones that feel the most comfortable, preferably not too heavy on your feet. We put an extra waterproof coating on our boots just before we left Australia.
Casual shoes/sandals are optional, though very few people want to wear their walking boots down to dinner in their hotel! Again, choose carefully. The lighter- and the more versatile- the better!
o GAITERS/WATERPROOF PANTS: Both of us had only waterproof gaiters, which kept our lower legs dry. Walking in a light snow-shower was not exactly what we had envisioned, and waterproof pants would have been ideal, as my long leggings were not really adequate and I had to keep moving to stay warm. If you plan to cross passes in all ranges of weather, take lightweight waterproof pants.
o RAINCOAT: Also spend money on a good raincoat. Windproof, waterproof, with stow-away hood and numerous pockets. On the day mentioned above, three layers consisting of T-shirt, light knit hoodie and the raincoat ensured I was warm enough, at least on the top!
o MICROFIBRE TOWEL: Like the raincoat, backpack and boots, we purchased this from a shop which specializes in hiking/camping, etc. On hot days I dampened this with cold water before setting off. You can see mine (bright pink) in many photos. My husband turned his into a headscarf!
My roll-up compact toiletery case
.
.
.
Further packing: Toiletries and other essential items
o Shampoo/conditioner
o Toothbrush/toothpaste
o Sunscreen & SPF lip balm
o Basic medical kit including anti-inflamm cream/tablets, plasters (band-aids), paracetamol and any other medication you may need. If you have a slightly weak knee (like me!), an elastic brace is a must. It really helped, especially in the downhill sections.
Another recommendation is a small pack of blister-covering plasters. Despite all the preparation walks, I still managed to get a blister on 1 toe. I highly recommend the “Compeed” brand, purchased in Switzerland. The plasters make a protective gel-like layer form across the blister, which lasts for many days.
o Small amount of washing powder for clothes
o Small plastic container for carrying food
o Zip-lock bags of various sizes. I had several, and mine carried a small phone-charging device (also highly recommended), my charging cord, lip balm and other items I wanted on hand in the side pockets of my backpack. A larger one carried soiled clothes for washing.
o At least one large bottle for water. (I took one small bottle that was designed for running: it had an elastic holder that fits over your hand, plus 1 large bottle which hung from the front of my pack with a Velcro strap)……
o A couple of Velcro straps and/or mountaineering rope clips- carabiners- are very handy. I bought mine from a baby-goods shop (believe it or not!), as many mums use them to hang things from their buggies.
Decant as many shampoos, lotions, perfume/aftershave, etc. as you can into small plastic (leak-proof) containers. Label them well.
Your backpack:
Along with boots and raincoat, this is the 3rd item you should choose carefully. Mine was the right size and shape for my needs (don’t be afraid to try several), plus it had a built-in retractable rain cover and good-sized side pockets for easy access. My husband had an older backpack, and the rain cover was bought separately. When you read about our first pass crossing, you will see why we will be spending money on a new backpack for him before going on any similar walking holidays!
The toiletry pack I chose was excellent, and it could hang anywhere for easy access, then roll up into a fairly small cylindrical shape. I recommend looking around for something similar.
The flight:
This is when all those who live in the UK (or even closer) can have a laugh! When flying from faraway places like Australia, a little bit of planning ahead does not go astray, especially when you are accustomed to carrying a handbag at the very least!
Remembering that everything you have must eventually be carried on your back (or discarded!), I took a couple small bottles of lotion, saline (I wear contact lenses), glasses, etc. in a zip-lock bag, my phone (of course), and some magazines which were “handed on” at my destination. In-flight entertainment is so good that the magazines are just an option to reduce screen-time. ....And on to the walk!
Read similar posts